

It’s the MOST wonderful time of the year!
Not just because of Christmas and the awesome winter season upon us. But because those things lend glorious inspiration to all things CAKE!
And I’ve got a beauty to share with you along with a few behind the scenes tutorials on my techniques.
*Sigh… I hate doing this ’cause it’s just awkward… there are affiliate links to products on this page (and most pages of my site) that, if clicked and purchased, will result in a small commission to me. Like 31 cents. That seems to be the most regular number that comes up. I’m required by the FTC to tell you this. But like one of my favorite bloggers once said, you clicking those link is like giving a monkey a banana. It keeps me churning out more tutorials and sending my kidlets to tae kwon do. Two things that keep me sane and happy. :)*
White and brilliantly festive red (with a hint of gold) is all that’s needed to spread the holiday cheer in cake 
A tip to get that brilliant warm red, take your pre-colored red fondant and add a couple drops of Americolor Egg Yellow. I learned this when I interned years ago and was SHOCKED at how it bumped up the richness and depth!
Using a variety of different techniques for texture, two colors can be easily transformed into something kinda special, if I do say so myself.
The trees were a big deal for me. Why? Who knows?!? But I was itching to pipe something so I dug up some info on the Lambeth Method of decorating to refine my royal icing and application. Totally worth it to bring back this classic technique for a modern cake design!
My royal icing recipe is at the end of this page for you.
I grabbed the piping tips that I thought would lend best to a distinct texture for the bark of the tree. These ones were my favorites, so I piped a line with each to show you what they look like with a stiff royal icing. 1M and 70 were my favorites Truly, you can use any combination of these, or all of them if you enjoy making more dishes for yourself.
All of these tips are from Wilton and can be found at your local craft store.
This is the 4B tip and the fine but plentiful ridges are a gret start for your truck and branches.
That little blub on the side from an air bubble in my piping bag is ok Tree bark isn’t perfect. Also, thsi would get covered with more small piping anyways. That way, if your caker OCD went into overdrive about it, you can hide it.
This is tip 61 that looks like and angled crescent moon. It stands beautifully on it’s edge for some really dramatic height and definition.
Number 70, also known as the leaf tip in the buttercream realm, might be my favorite of all of them. I love that ridge it creates in the center with irregular waves atop and on teh bottom. Again, this one stands up on edge beautifully! The grass tip (233) is seen just to the right.
You’ll want to pipe your tress (or any decor that that you’ll be drying off cake) onto a non-stick surface. Parchment will work, but I greatly prefer my baking foil from Pastry Portal. It’s super thin, those wrinkles do not matter one bit, and it lasts FOREVER! I’ve grown to prefer these to my SilPats. And I was a SilPat junkie. I own like 10 of them…
I started here with the 1M (our very classic cupcake tip )
I moved right away to adding the smaller branches that were just going to pop off the larger branches. Piping these right away without dry time is fine. You’ll want to avoid piping over these branches until the first payer has dried, though. They may meld into each other otherwise.
A few more smaller-er ones…
And now it’s at a point where I will let it dry till it’s firm before adding any layers over top.
If your kitchen is humid or you need to speed up your drying, try this: turn your oven on to it’s lowest possible setting. Allow it to preheat for 2 minutes (no more) and then add your try of piped royal icing to the oven, but leave the door slightly cracked open. You don’t want to use too much heat, or concentrated heat as you royal will discolor. We want brilliant white!
Next I prepared my wavy bands of fondant for the two snow layers. I applied this directly to my fondant covered cake, but I’m working flat here on a piece of fondant just to show you.
I rolled a strip of white fondant out the circumference of my cake (measurement all around the outside) and about 4 inches wide. Using a pastry wheel (or Scalpel/XActo) I cut through it in a wavy line. Make one side significantly smaller than the other so when they are layered they are distinct visually.
Next, I used some edible super pearl dust with grain alcohol and painted it onto the larger strip. Why didn’t I use my shortening and luster method? I have to adhere the shorter layer of wavy fondant to it with some water and the shortening (aka fat) will resist it. 😉 Allow that super pearl to dry.
When you layer them with the larger super pearled layer behind and the plain fondant in the front, it really helps to set the taller layer back visually. It creates a really cool depth like you would see when your out one horse sleigh riding through the fields. ‘Cause of course we all do that. Gotta get to Grandma’s house somehow…
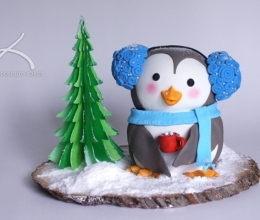
Next I made my wafer paper snow This is the same technique that I used in my Snowy the Penguin tutorial. This is a GREAT way to use your overly dry and brittle wafer paper!!!
Tear it into squares about as big as a pecan and place it into your coffee/spice grinder (that’s dedicated to only cake things… no real coffee or spices in this one) and grind away! If you keep it grinding and give it and up and down shake a few times, it’ll grab the paper better and grind through it more quickly.
And this is the glorious result. Light, fluffy, distinct “snowflakes” and a super cool texture. Throw in a bit of super pearl dust while grinding to give it that glistening reflective quality when the sunlight hits it the right way.
To adhere this to the cake I used a little bit of shortening. Why not water, Kara? These little snowflakes are so tiny that even a bit of extra water might dissolve them. They’ll happily stick to shortening and won’t melt into mush.
Ad there she is This cake makes me happy beyond measure. I have been waiting all year to get this design out onto cake. It’ such a satisfying feeling to accomplish that creativething that been dancing around in your brain forever!
I know. You’re asking me “What about that bow?”
That bow was done with Eva Salazar’s method in her two Craftsy Classes, this one and this one. I’ve made bows before, but Eva is the MASTER of sugar bows, so I needed to learn some solid techniques. My additions to her technique is using a rubber stamp to emboss the red bow fabric with a pattern that I could later paint with gold highlighter while it dried. It’s a great way to get a detailed pattern onto your sugar work to then be able to paint with precision.
Also, I use an edible spray lacquer to set the finish on the bow and give it a satin sheen. This stuff is awesome for setting sugar and protecting it from humidity. NO, I would not suggest putting this all over your cake tiers to keep humidity off them. Just any sugar work you need to preserve. Isomalt LOVES this stuff!
Royal Icing Recipe:
1 pound Confectioners’ (powdered) sugar, sifted
5 tablespoons meringue powder
1/2 cup water
Sift the sugar and meringue powder together into a stand mixer bowl. And add the water and mix on low speed with a paddle attachment for 10-12 minutes. Scrape the bowl every few minutes. Store in an airtight container in the refrigerator if you aren’t going to use it right away.
Are you going to use one of these techniques on your winter or Christmas cake designs this year?!? Tell me below how you would use them, and tehn be sure to share a picture of your finished work on my Facebook page! Happy caking everyone!


Gorgeous cake! Love the embossing on that bow and definitely inspiring to use some royal icing:)
Hi Kara,
Great tutorial. I would definately use the tree technique. Living in South Florida, where we dream of snow days, I would replace the red with green (forever green here) and the trees chocolate colored. Of course leave the snow (it art). I may just try that real soon.
You are terrific teacher. Thanks for sharing.
Jeannie
Thank you, Jeannie! I’m glad I can help bring a bit of the northern snows to Florida
Really nice tutorial,I enjoyed it.
What a great tutorial!! love the cake, very festive and so clever. The bow is perfect and I love the stamp technique to make it more festive. Thank you so much for sharing your amazing work and your nice words!!
If I am going to use some of the techniques you shared? Absolutely YES! Oh that bow… Simply gorgeous Kara. And that snow… Wow! You make magic with your imagination and hands. I have to make Snoopy’s house cake and can’t get started to try out your ideas. Thanks so much for sharing